In today’s digital world, having an online store is essential for businesses of all sizes. Shopify provides one of the most powerful and user-friendly website builders designed specifically for eCommerce. Whether you’re a small business owner, an entrepreneur, or an established brand, Shopify’s website builder makes it easy to create a professional and fully functional online store without any coding skills.
This guide will walk you through everything you need to know about Shopify’s website builder, from its features and benefits to a step-by-step guide on how to build your store.
I. Introduction to Shopify Website Builder
1.1. What is Shopify Website Builder?
Shopify website builder is a powerful, user-friendly tool designed to help you create a functional and professional eCommerce store. Whether you're an entrepreneur launching your first store or an experienced business owner looking to expand into the digital space, Shopify provides the comprehensive features you need to establish a successful online presence.
1.2. Benefits of Using Shopify Store Builder
II. How to Build a Website with Shopify: Step-by-Step Guide
Step 1: Define Your Online Business Goals
Before you start building your website, define your purpose and business objectives:
✅ What products or services are you selling?
✅ Who is your target audience?
✅ What makes your business unique?
✅ What are your short-term and long-term goals?
Understanding these aspects will help you create a website that effectively represents your brand and attracts the right customers.
Step 2: Sign Up and Choose a Plan
To create a website on Shopify, you need a Shopify account, as Shop integrates directly with Shopify stores. Follow these steps:
- Sign up for Shopify – Start with a free trial or choose a plan that fits your business needs.
- Set up your store details – Enter your business name, contact information, and preferences.
- Choose a Shopify pricing plan – Pick from Basic, Shopify, or Advanced plans depending on the features you need.
Step 3: Choose a Domain Name
A custom domain makes your store look more professional. You can:
🔹 Purchase a domain directly from Shopify.
🔹 Use Shopify’s Business Name Generator for ideas.
🔹 Connect an existing domain if you already have one.
Having a clear and memorable domain name improves brand recognition and credibility.
Step 4: Select a Theme and Design Your Website
Your website’s design plays a crucial role in attracting and engaging customers.
-
Choose a Theme:
- Shopify offers free and premium Shopify Themes to customize your website.
- Use Shopify’s drag-and-drop editor to modify the layout, colors, and fonts.
-
Add High-Quality Images & Content:
- Use Shopify's Burst stock photos or upload your own product images.
- Write clear, engaging descriptions to inform and persuade customers.
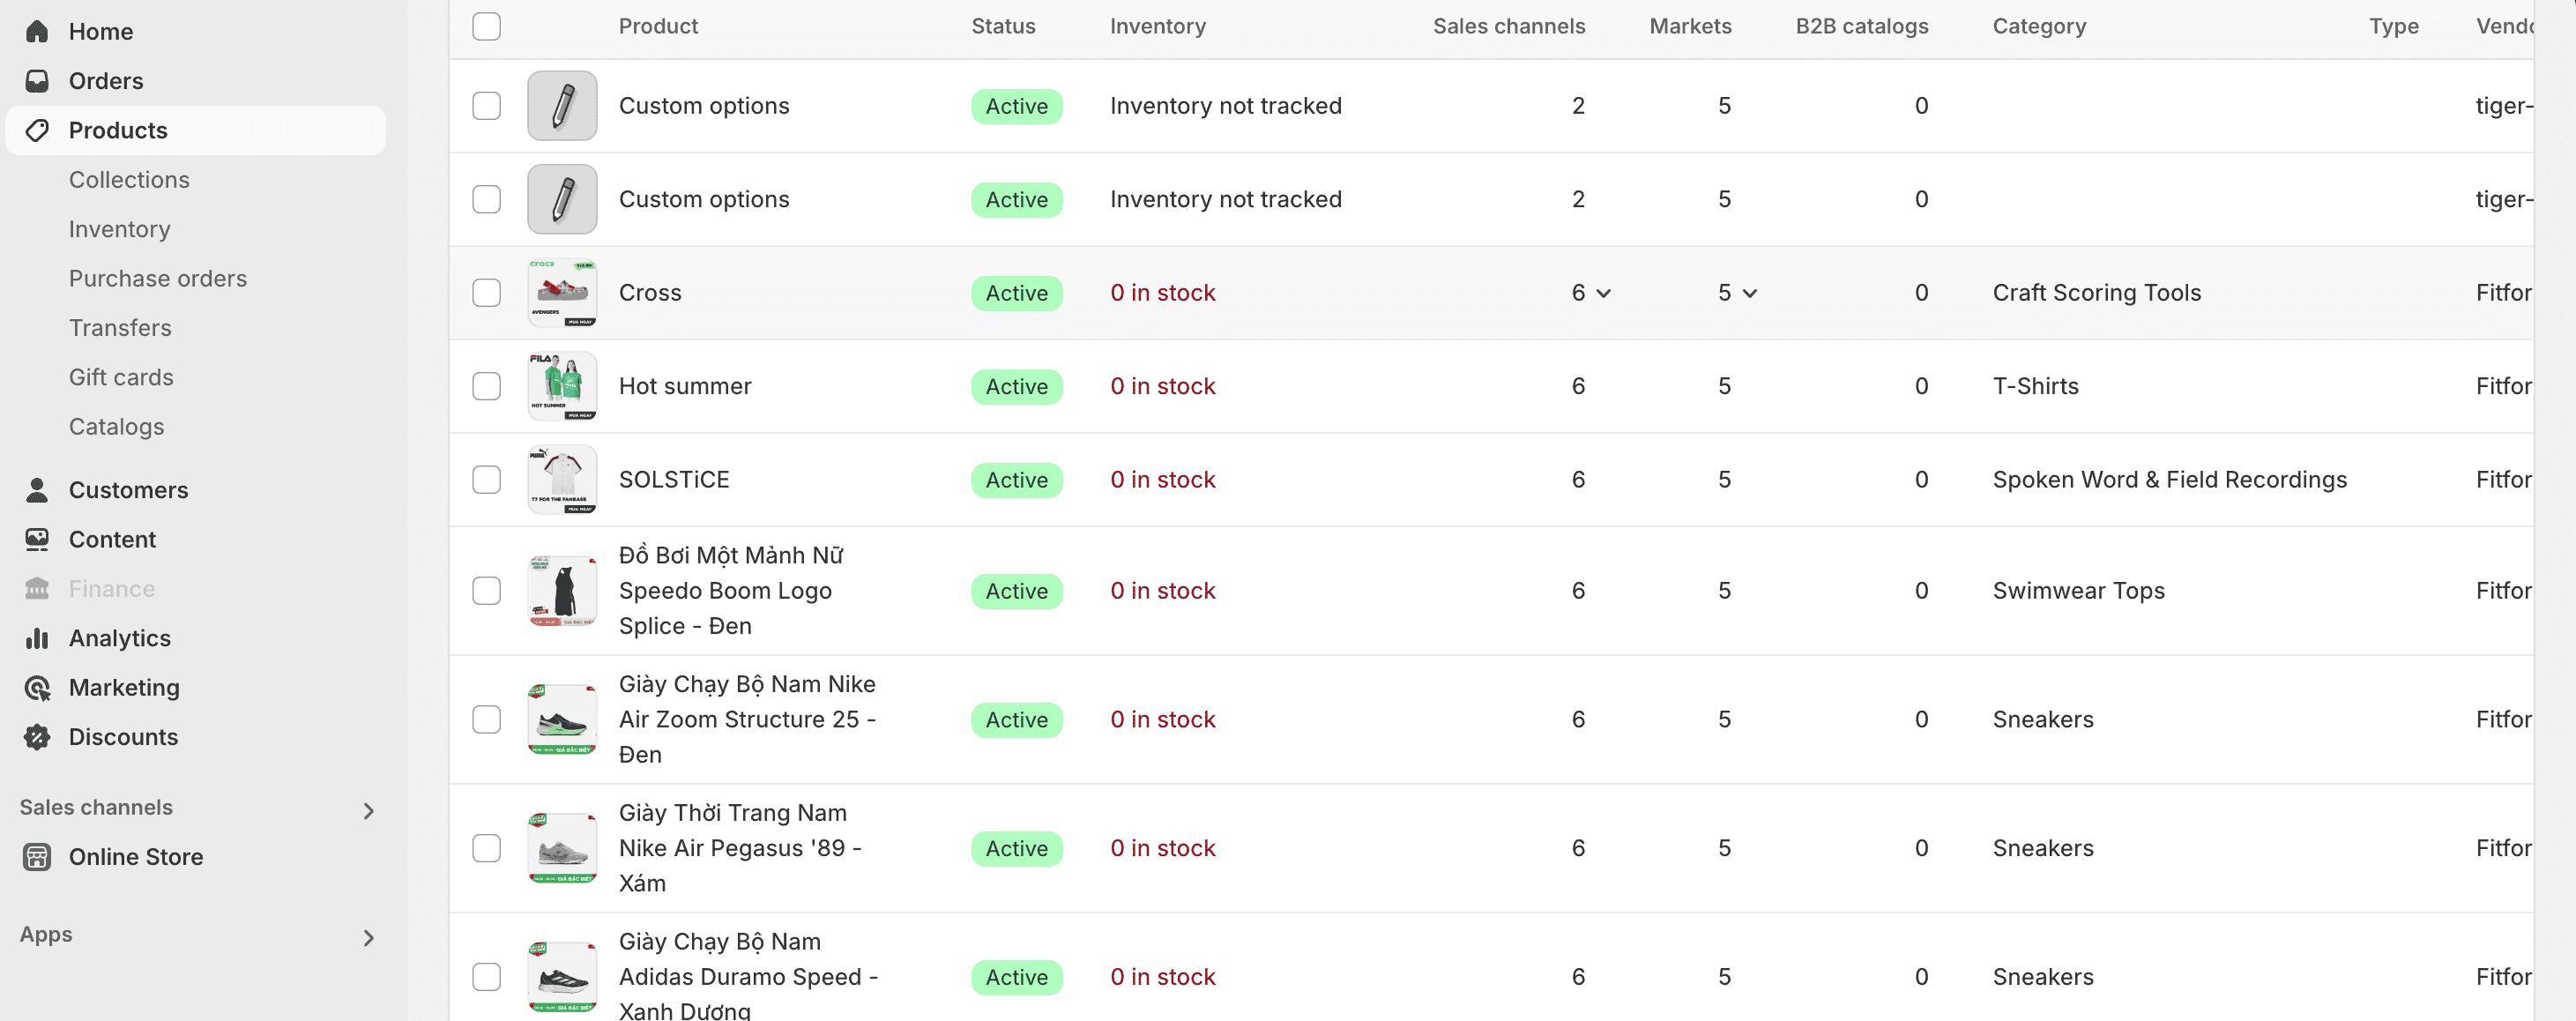
Step 5: Add Products and Pages
Now it's time to populate your store with product listings and important pages.
- Adding Products:
- Go to Products in your Shopify dashboard.
- Upload high-quality images, write descriptions, and set pricing.
- Organize products into categories to make shopping easier for customers.
- Essential Pages to Include:
- Home Page – Introduces your store and key offerings.
- About Us – Tells your brand story and builds trust.
- Contact Us – Provides support and contact details.
- Shipping & Returns – Sets clear policies for customer convenience.

💡 Bonus: Add a blog to share updates, promotions, and SEO-friendly content.
Step 6: Set Up Payment & Shipping Options
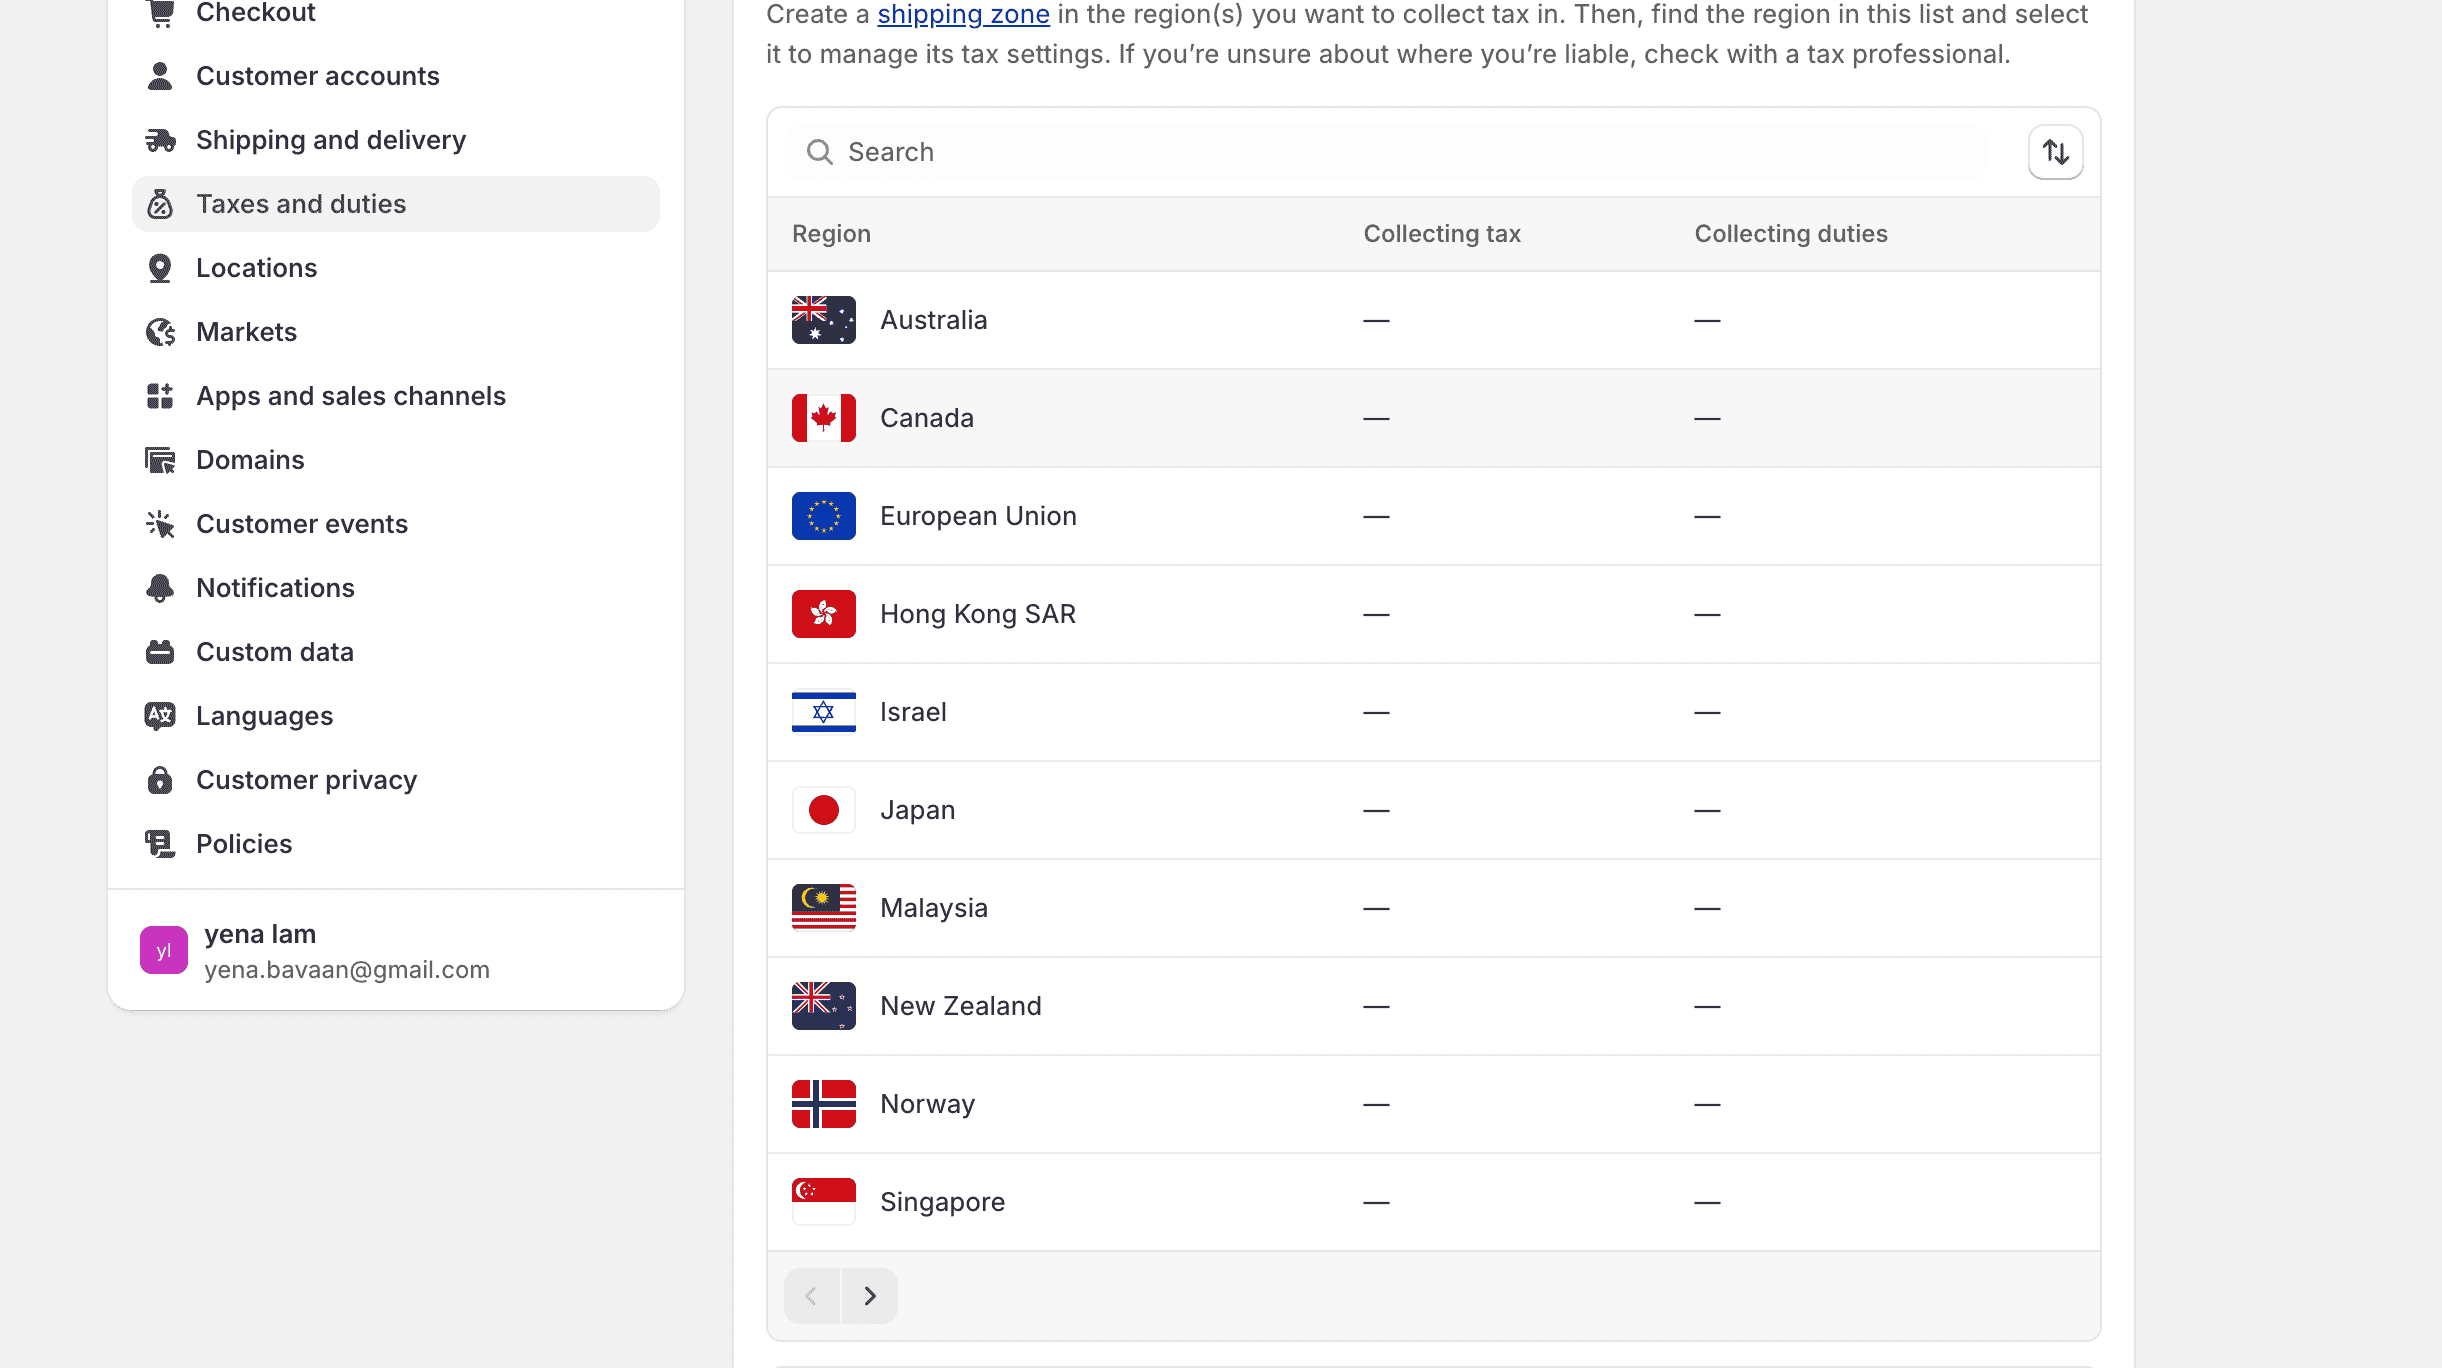
To enable smooth transactions, configure payment and shipping settings.
-
Payment Methods:
- Shopify Payments (Recommended)
- PayPal, Stripe, Apple Pay, and other gateways
-
Shipping Settings:
- Set up shipping zones and rates.
- Offer free shipping, flat rates, or real-time carrier rates.
-
Automate shipping labels and order tracking.
Step 7: Optimize for SEO and Mobile
Make sure your Shopify website is optimized for search engines and mobile users.
-
SEO Best Practices:
- Use relevant keywords in product titles and descriptions.
- Write unique meta titles and descriptions.
- Generate an XML sitemap for search engines.
-
Mobile Optimization:
- Choose a mobile-friendly Shopify theme.
- Ensure fast page load speeds for better user experience.
Step 8: Preview, Test, and Launch Your Website
Before going live, thoroughly test your website:
✔ Place a test order to check the checkout process.
✔ Ensure all links, pages, and images load correctly.
✔ Remove the store password to make the website public.
✔ Announce your launch via social media, email marketing, and ads.
Congratulations! Your Shop website is now live and ready to attract customers.
III. Shopify Website Builder vs. Other Website Builders
Ensure everything works correctly by placing a test order. Remove your store password to make it live and select a subscription plan to officially launch.
IV. Key Features of Shopify Website Development
4.1. Shopify POS (Point of Sale)
- Sell in physical locations such as retail stores, pop-ups, and markets.
- Sync orders and inventory across all sales channels.
- Fully customizable interface.
- Integrated hardware for seamless transactions.
Read more: Shopify POS Pricing - Sell Everywhere
4.2. Payment Gateway and Integrations
Shopify supports multiple payment options, including:
- Shopify Payments – No need for a third-party provider.
- PayPal – One of Shopify's default payment providers.
- Over 100 third-party payment providers worldwide.
4.3. Abandoned Cart Recovery
Cart abandonment is a major challenge in eCommerce. Shopify allows businesses to recover lost sales by sending automated email reminders to customers who abandon their carts.
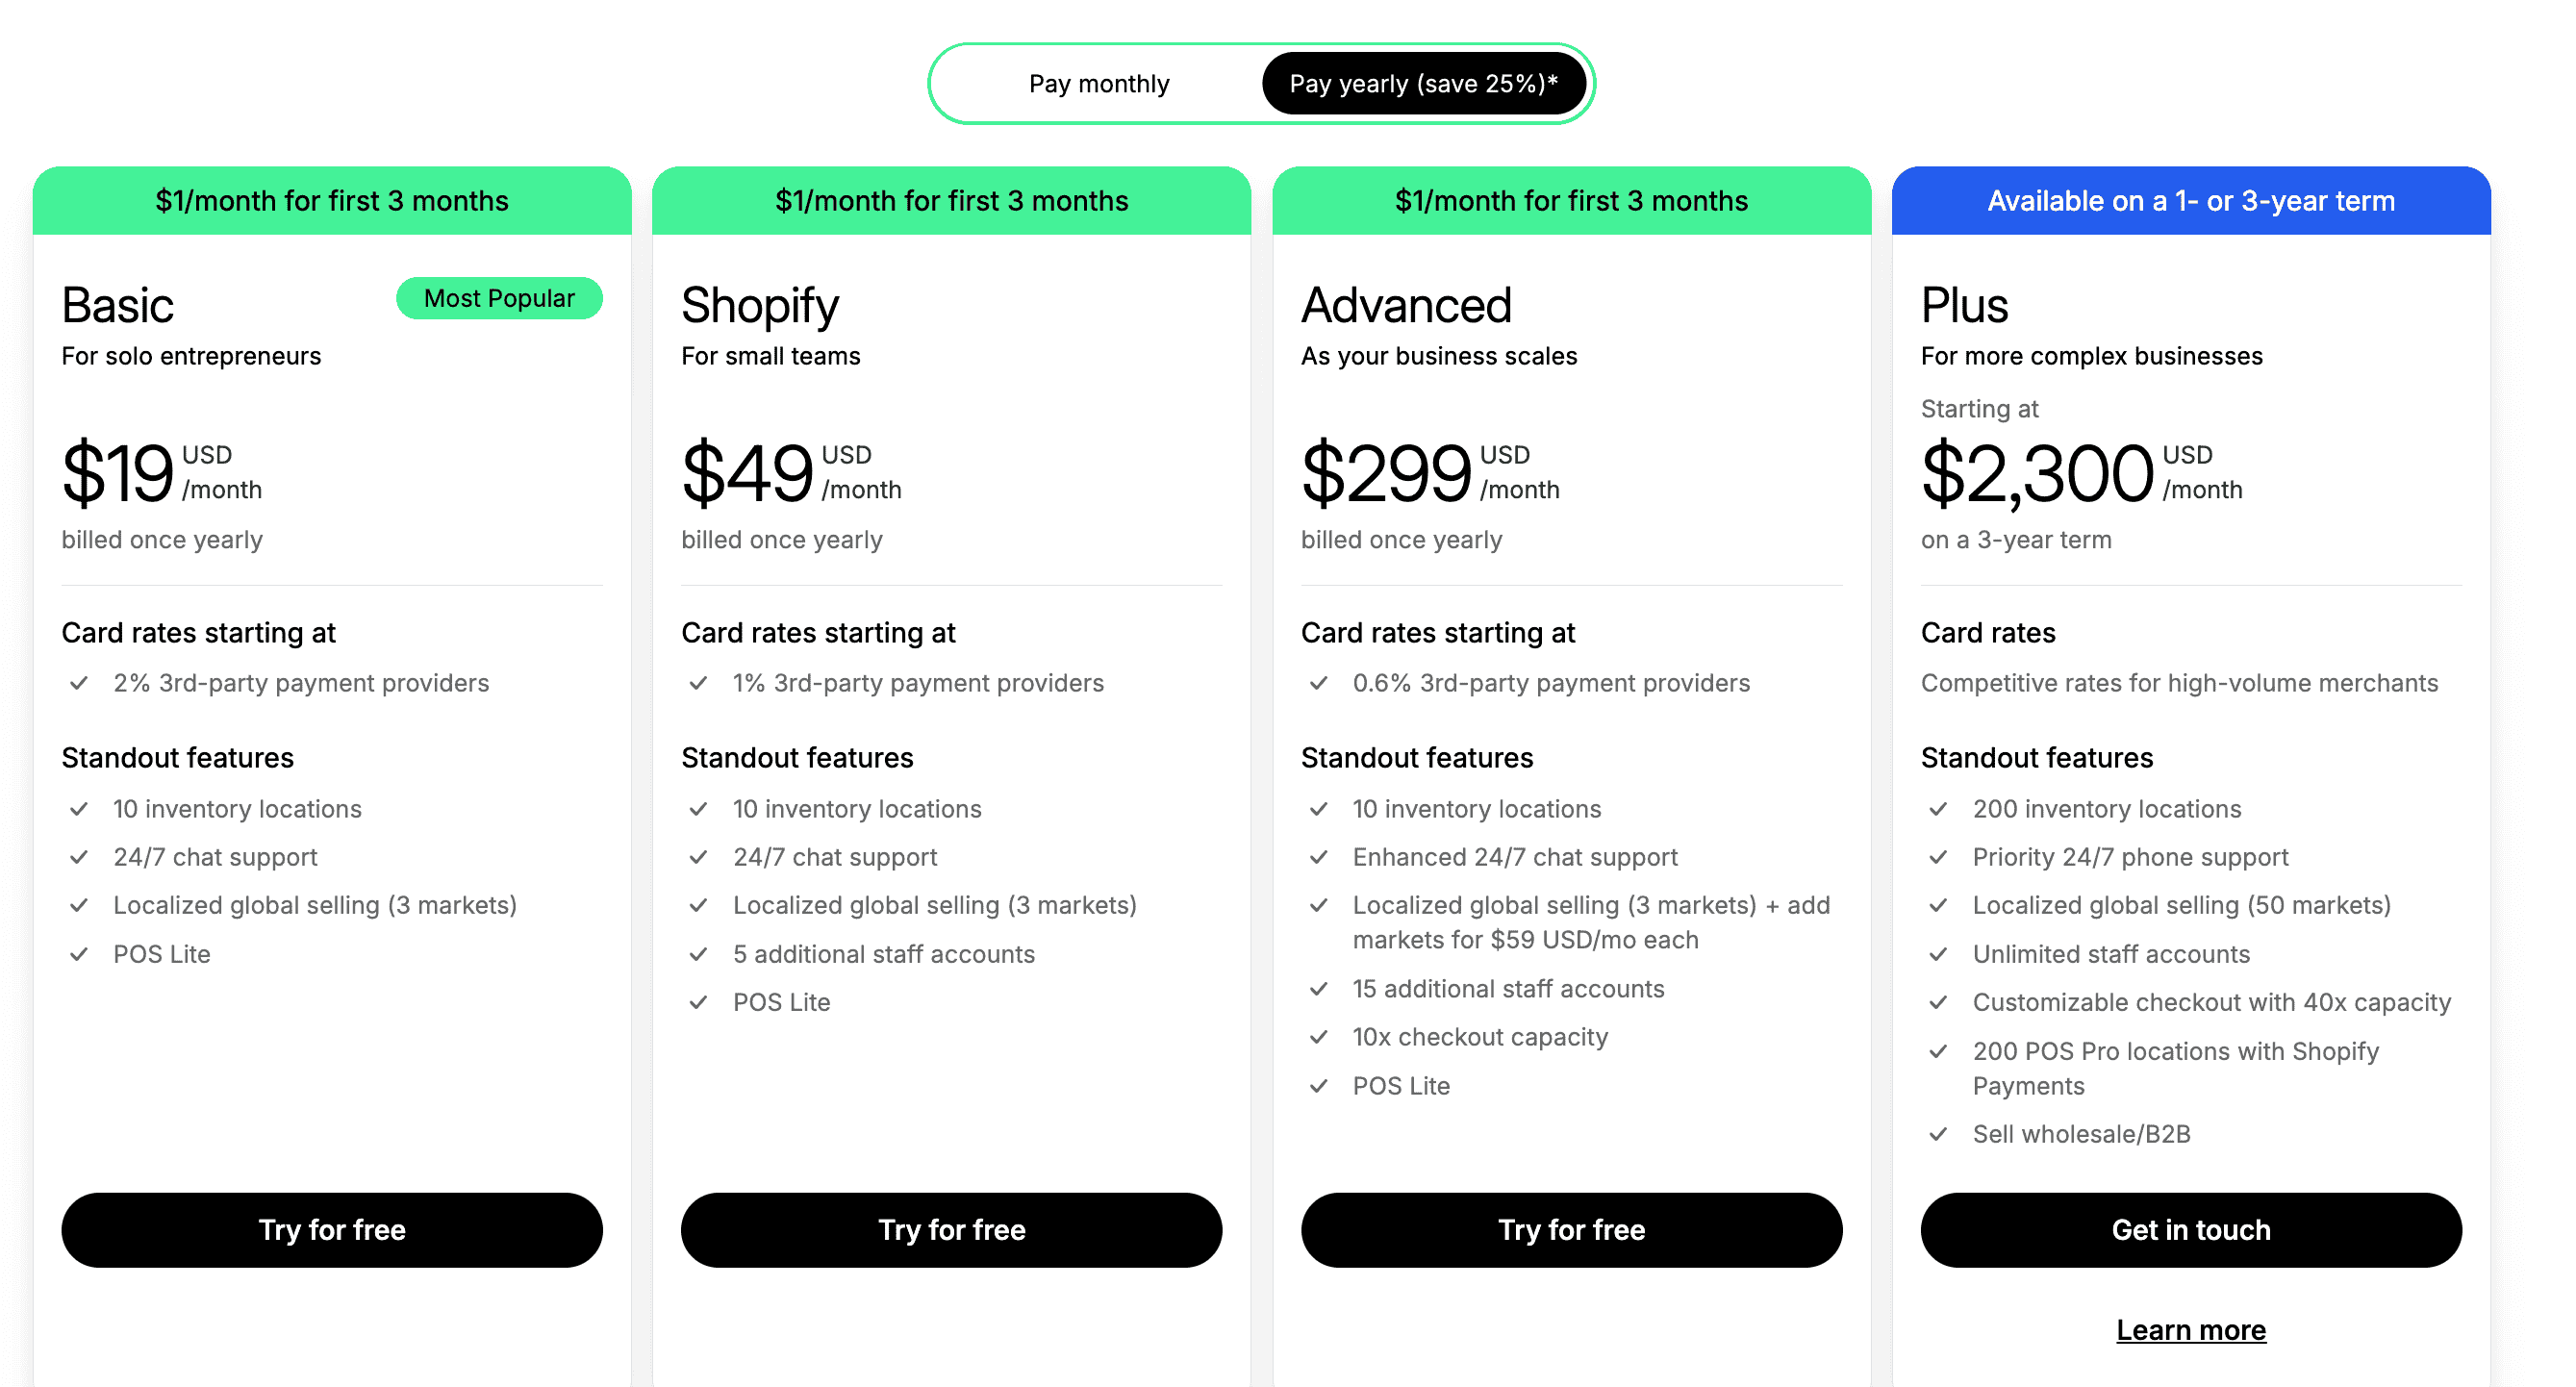
V.Shopify Website Builder Cost
Shopify offers different pricing plans based on business size and needs. Here’s a breakdown of the costs based on the latest pricing:
5.1. Shopify Pricing Plans (Billed Yearly)
5.2. Additional Costs to Consider
- Domain Name: Starts from $14 per year if purchased through Shopify
- Themes: Free themes available; premium themes cost $100–$350
- Apps & Plugins: Prices vary based on functionality
- Transaction Fees: If using third-party payment providers, fees start at:
- 2% (Basic)
- 1% (Shopify)
- 0.6% (Advanced)
Would you like to include a comparison with other website builders? 😊
VI. Customizing Your Shopify Website Design for Maximum Impact
One of the best advantages of using Shopify’s website creator is the ability to customize your store’s design to reflect your brand’s identity and enhance user experience. A well-crafted Shopify store design can boost conversions, improve customer engagement, and set you apart from competitors.
6.1. Create a High-Converting Homepage
Your homepage is the first impression visitors get when they land on your store. It should be visually appealing, easy to navigate, and optimized for conversions.
How to Customize Your Shopify Homepage:
✔ Use Shopify’s drag-and-drop editor to rearrange homepage sections.
✔ Use Shopify’s drag-and-drop editor to rearrange homepage sections.
✔ Highlight bestselling products, limited-time promotions, or featured collections.
✔ Showcase customer reviews and testimonials to build trust.
✔ Use high-quality images and engaging banners to capture attention.
✔ Include a clear call-to-action (CTA) to direct users toward key actions (e.g., "Shop Now").
💡 Pro Tip: Want more flexibility? Use a Shopify page builder like PageFly or GemPages to create a fully customized homepage without coding. These tools provide more design control and allow you to test different layouts to see what works best for conversions.
6.2. Optimize Your Product Pages for Conversions
Your product pages are where customers decide whether to make a purchase. A well-designed product page can increase trust, reduce hesitation, and improve sales.
How to Customize Shopify Product Pages:
✔ Use high-quality images and add a zoom-in or 360-degree view feature for better product visibility.
✔ Optimize your product descriptions with clear, persuasive content that highlights benefits.
✔ Display customer reviews and ratings prominently.
✔ Include trust signals like money-back guarantees, free shipping offers, and secure payment icons.
✔ Add related product recommendations (cross-sells & upsells) to boost average order value.
💡 Enhance your product pages further by using apps like Loox (for photo reviews) and Boost AI Search & Discovery (for AI-powered product recommendations).
Read more: Maximize Your Revenue with Shopify Look App
6.3. Improve Navigation and User Experience
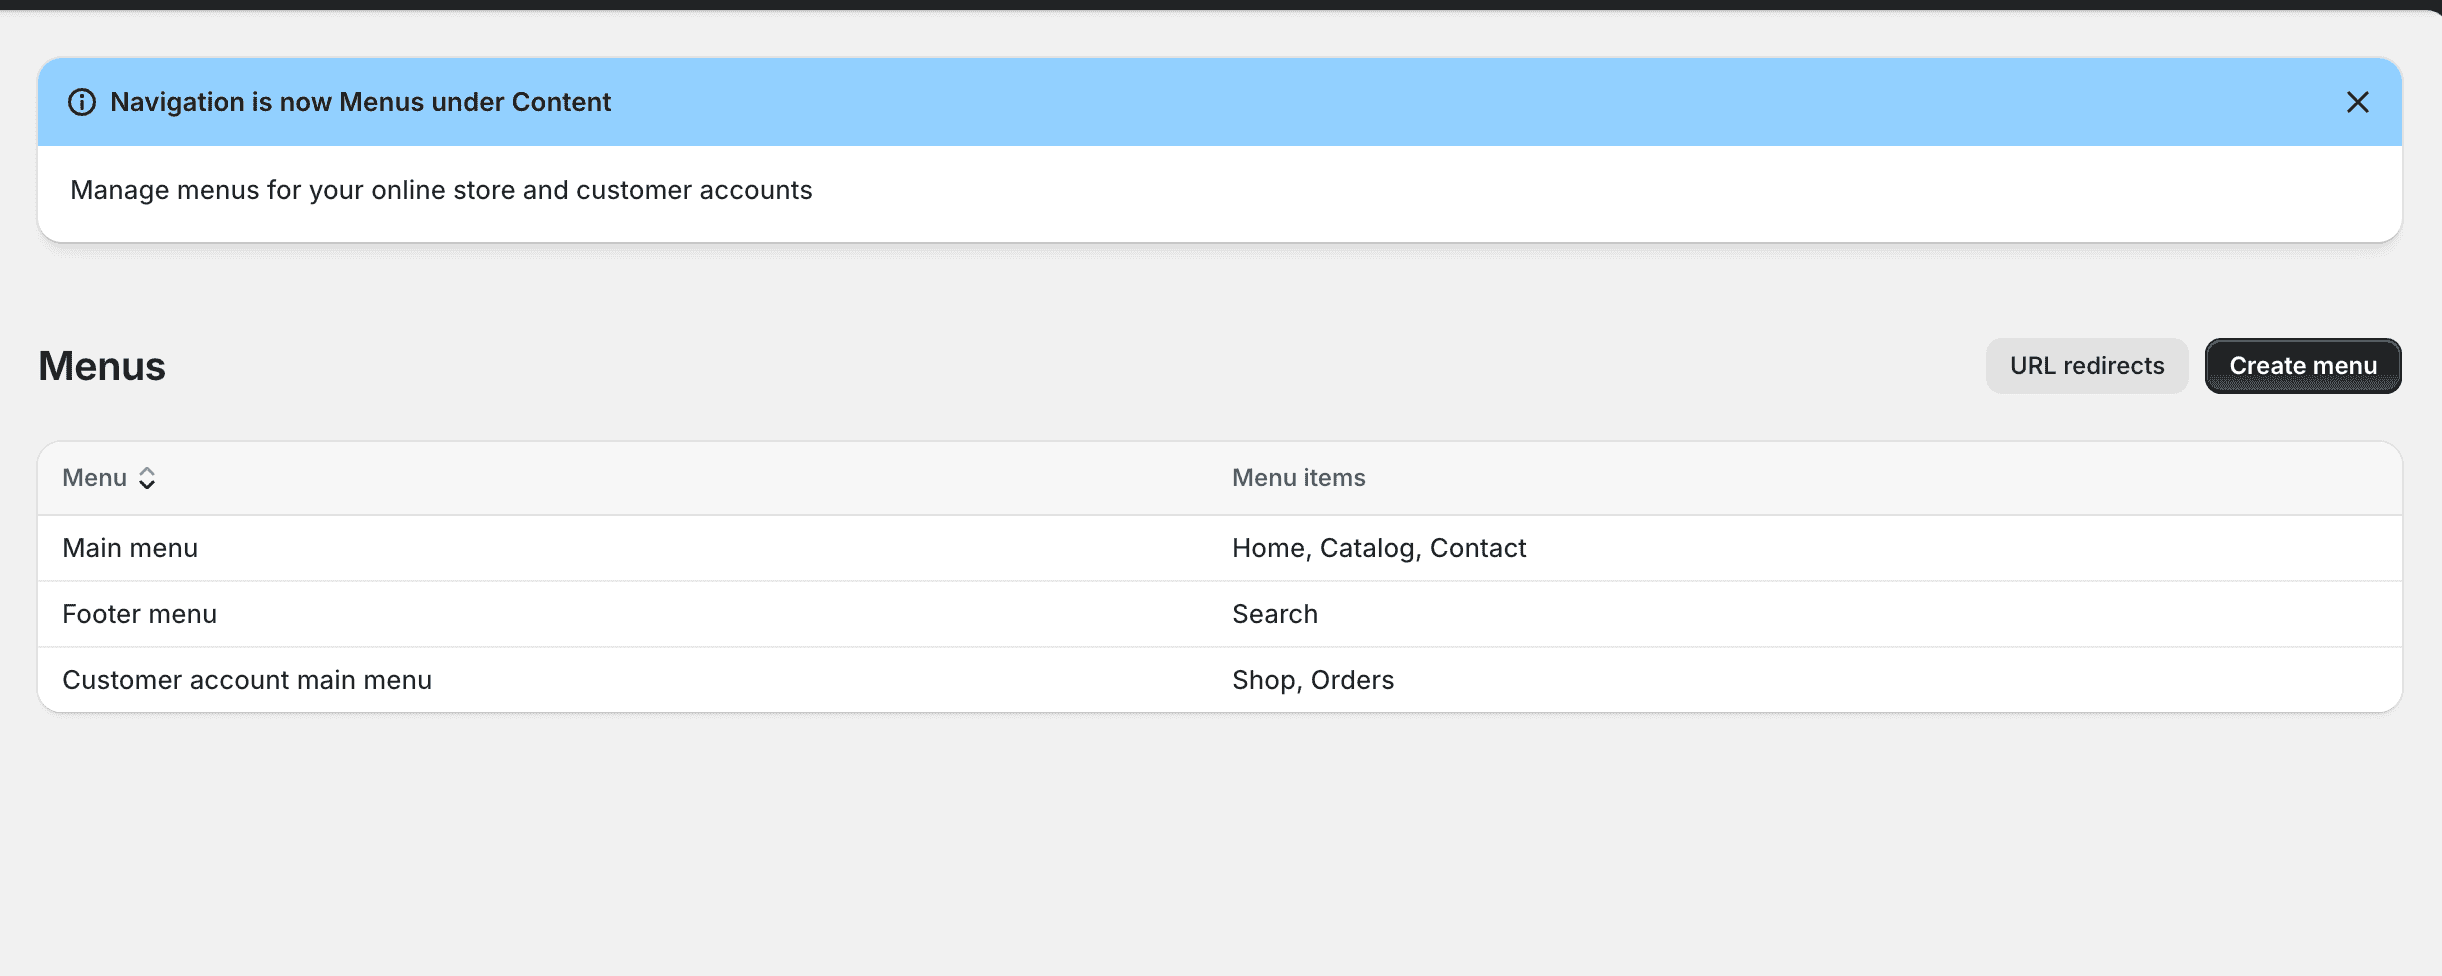
A well-structured navigation menu is key to helping visitors find products quickly. Poor navigation leads to frustration and increased bounce rates.
How to Customize Shopify Navigation for Better UX:
✔ Organize products into clear categories and subcategories.
✔ Use drop-down menus to simplify navigation.
✔ Add a search bar to help customers quickly find products.
✔ Place important links (Shipping, Returns, Contact) in the footer for easy access.
💡 Pro Tip: Shopify’s built-in navigation settings make it easy to create intuitive menus. Keep menu options short and direct to avoid overwhelming visitors.
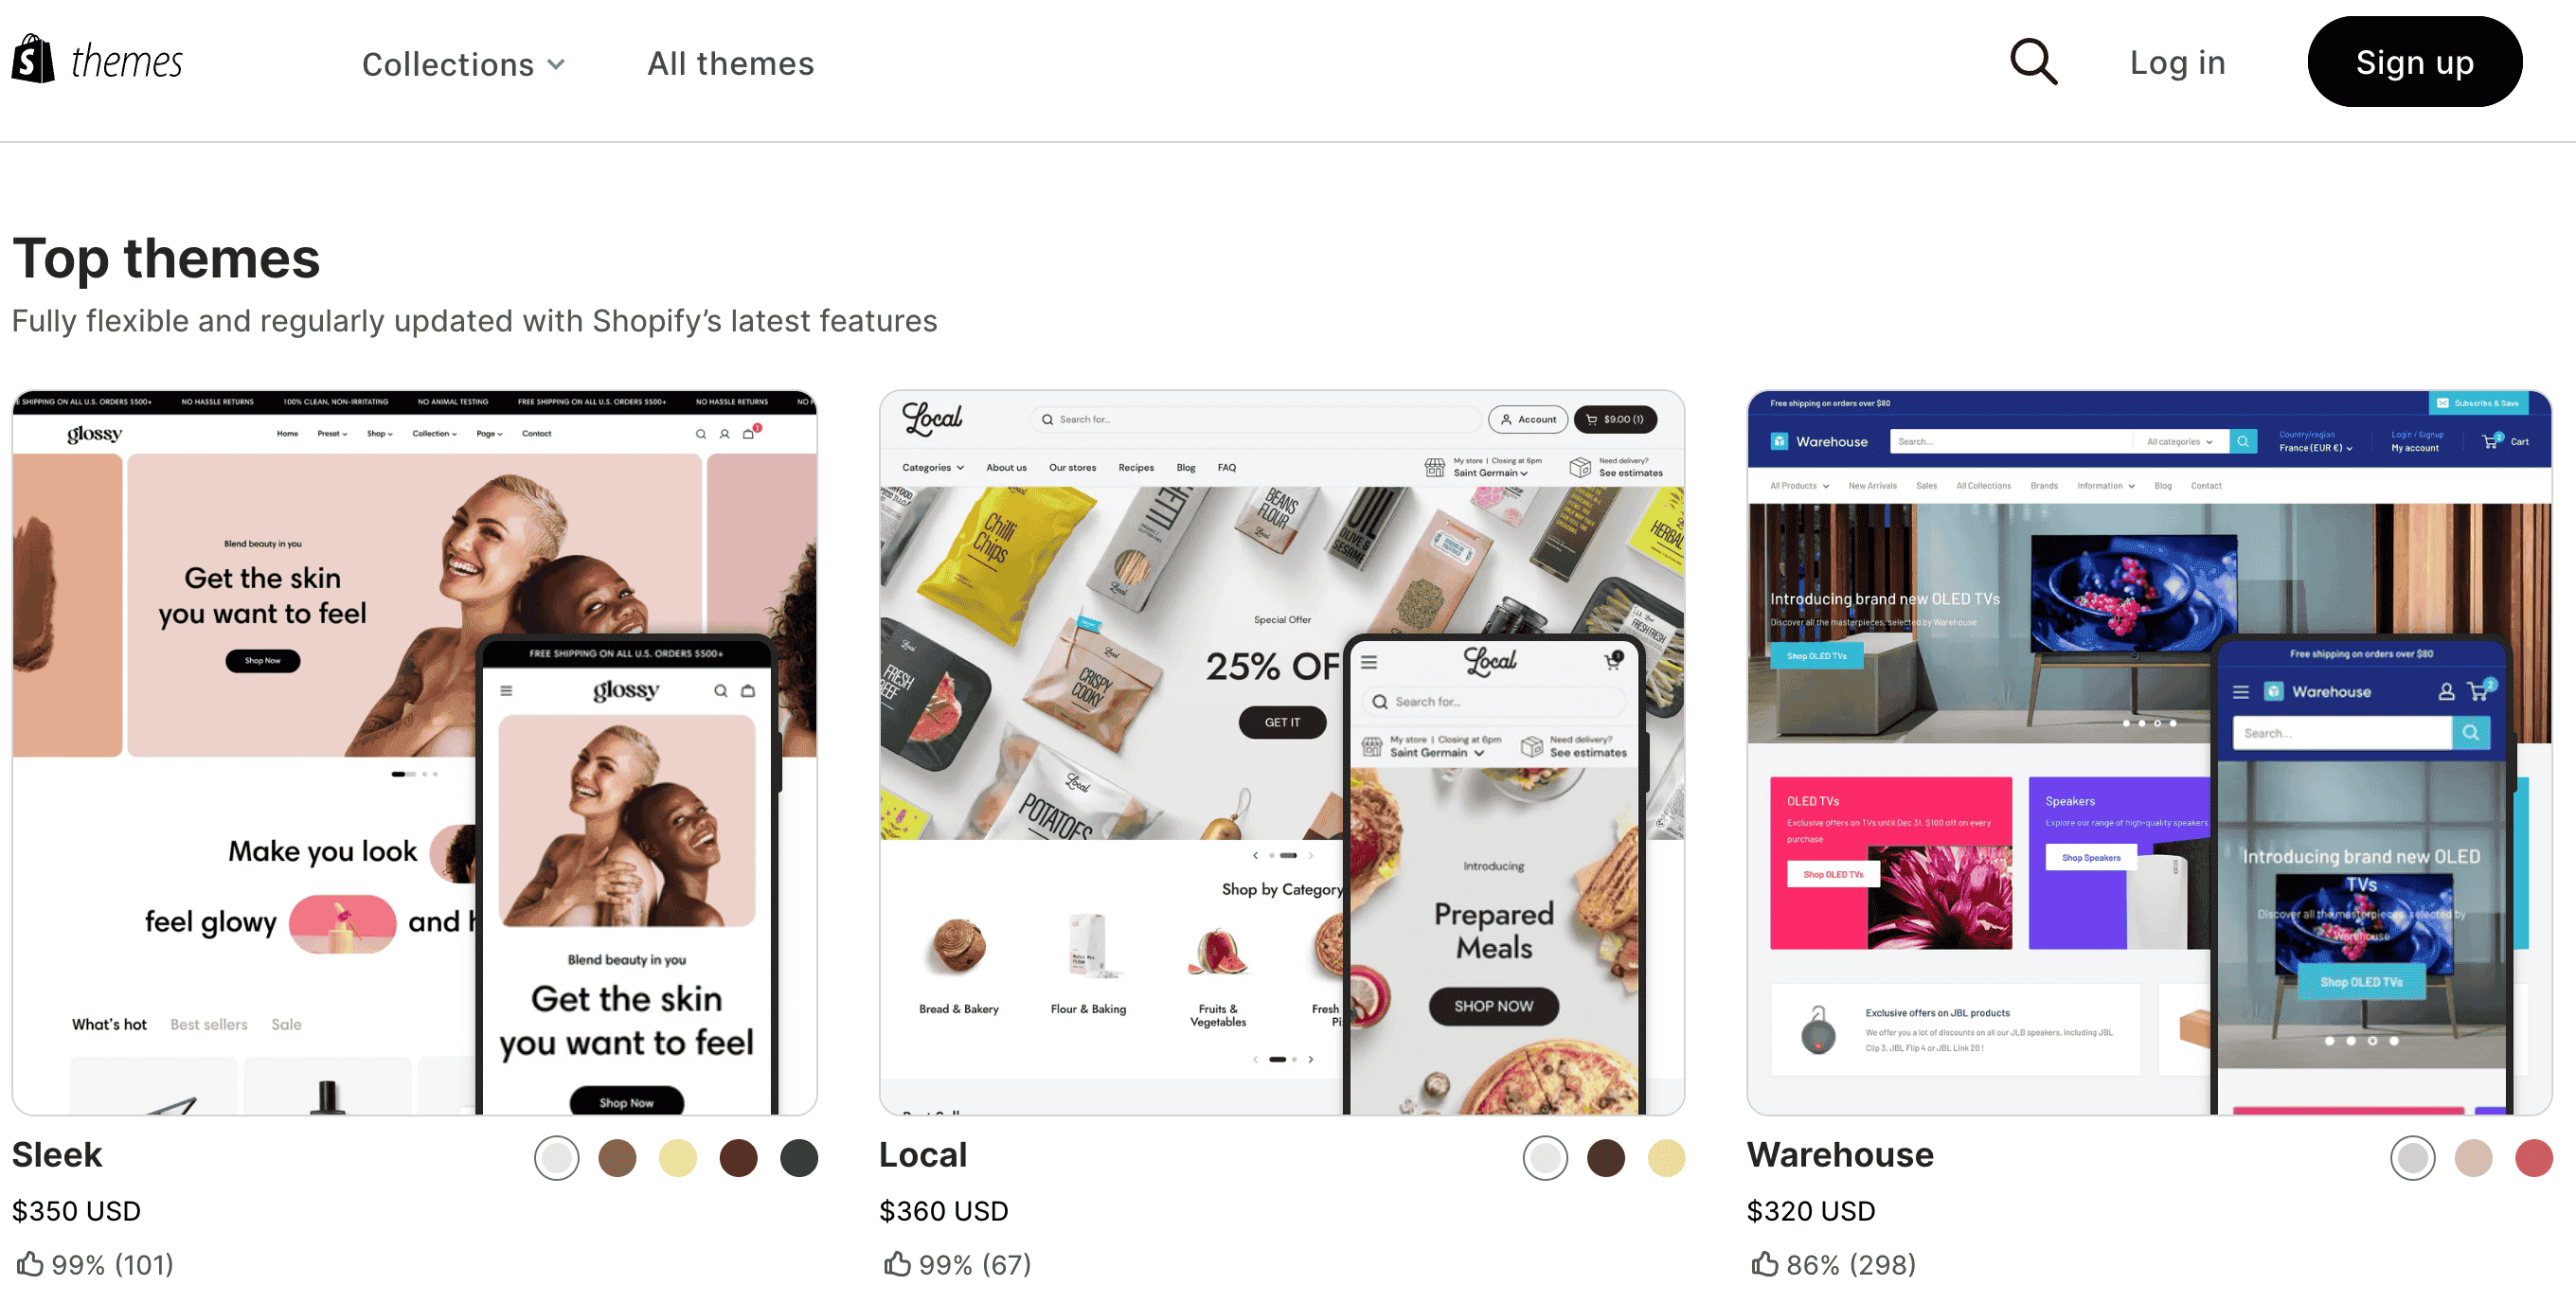
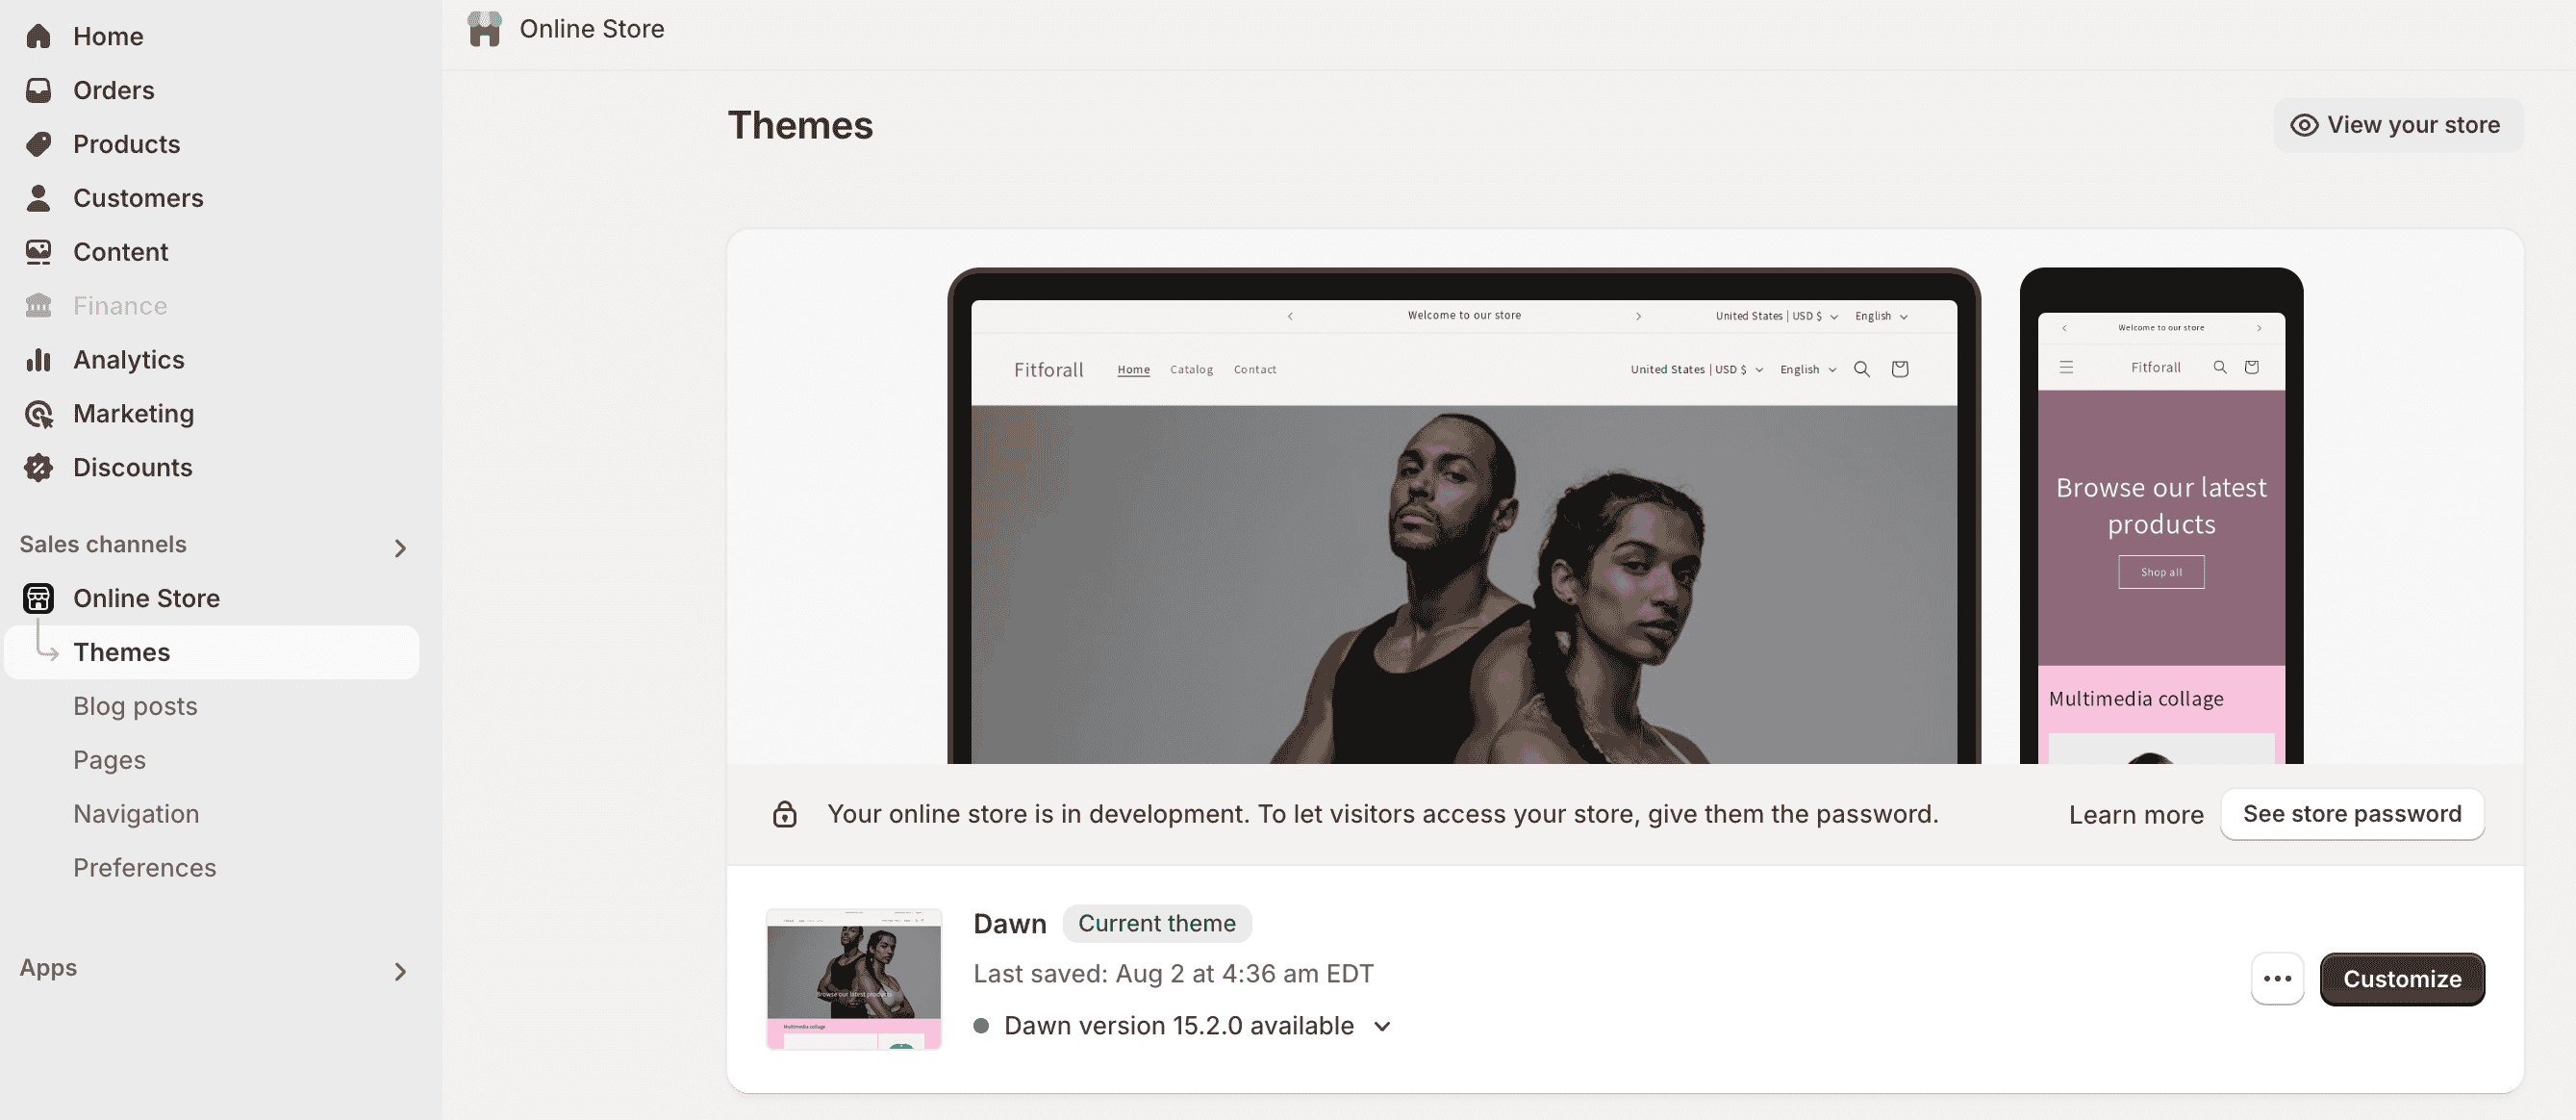
6.4. Choose the Right Shopify Theme for Your Store
Your Shopify theme determines your store’s overall design, layout, and functionality. Choosing the right theme ensures a professional look and improves user engagement.
How to Select & Customize a Shopify Theme:
-
Go to "Online Store" > "Themes" in your Shopify dashboard.
-
Browse Shopify’s free and premium themes in the Theme Store.
-
Select a theme based on:
- Your niche and industry
- Customization flexibility
- Mobile responsiveness
- SEO-friendly design
-
Customize your theme using Shopify’s Theme Editor, where you can adjust colors, fonts, layouts, and sections.
💡 Pro Tip: If you need advanced customization beyond Shopify’s built-in options, consider using Shogun or PageFly to build unique pages without coding.
6.5. Enhance the Shopping Cart Page to Reduce Abandonment
Your cart page plays a crucial role in the checkout process. If customers face friction at this stage, they might abandon their carts.
How to Optimize the Shopify Cart Page:
✔ Display product details (images, price, quantity) clearly.
✔ Offer shipping cost estimations upfront to avoid surprises.
✔ Add trust signals (e.g., SSL security badges, customer support info).
✔ Provide easy cart editing (change quantity, remove items, apply discount codes).
✔ Suggest related products or bundle deals to increase order value.
💡 Pro Tip: Use apps like ReConvert Upsell & Cross Sell to add post-purchase upsell offers and increase revenue.
6.6. Optimize the Checkout Page for a Seamless Purchase Experience
The checkout page is the final step in the customer journey, and optimizing it can significantly improve conversion rates.
How to Customize the Shopify Checkout Page for Conversions:
✔ Reduce checkout steps – Keep it simple and intuitive. ✔ Enable guest checkout – Let users buy without creating an account. ✔ Offer multiple payment methods – Accept credit cards, PayPal, Apple Pay, Google Pay, and BNPL (Buy Now, Pay Later) options. ✔ Display shipping and tax costs upfront to avoid last-minute surprises. ✔ Add security badges to build trust and reassure customers.
💡 Pro Tip: Use Shopify Plus for advanced checkout customization, including one-page checkout and customized fields.
6.7. Make Your Shopify Website Mobile-Friendly
With over 70% of eCommerce traffic coming from mobile devices, your Shopify store must be optimized for mobile users.
- How to Ensure a Mobile-Optimized Shopify Website:
✔ Choose a mobile-responsive theme from the Shopify Theme Store. ✔ Ensure fast page load speeds by compressing images and minimizing scripts. ✔ Use large, easy-to-click buttons for navigation and checkout. ✔ Keep product descriptions short and scannable for mobile users. ✔ Test your store on different screen sizes to ensure a seamless experience.
💡 Pro Tip: Google prioritizes mobile-friendly websites in search rankings, so optimizing for mobile can boost your SEO and increase organic traffic.
Final Thoughts
Shopify Website Builder is an all-in-one solution for anyone looking to create an online store without the hassle of coding. It’s packed with essential features, easy to use, and scalable as your business grows. Whether you’re a beginner or an experienced seller, Shopify’s website builder provides the tools you need to launch, manage, and optimize your online business successfully.
Ready to build your online store? Start your free trial with Shopify today and turn your vision into reality!
Read more: