
Mobile users now dominate global ecommerce traffic, with more than 70% of online retail visits coming from smartphones. As expectations climb for speed, convenience, and app-like experiences, brands are increasingly adopting Progressive Web Apps (PWA) a modern approach to delivering fast, installable, offline-capable shopping experiences without requiring an app store download.
Pairing a PWA with Shopify Headless unlocks even stronger performance potential. By decoupling Shopify’s backend from the frontend, developers gain freedom to build highly optimized, mobile-first user experiences that feel like native apps but run on the web.
This guide explains how to build a PWA in a headless Shopify architecture. Whether you are a developer or UX designer, you’ll find actionable steps, recommended tools, and best practices to help create a modern, mobile-first storefront.
I. Why Build a PWA on Shopify Headless?
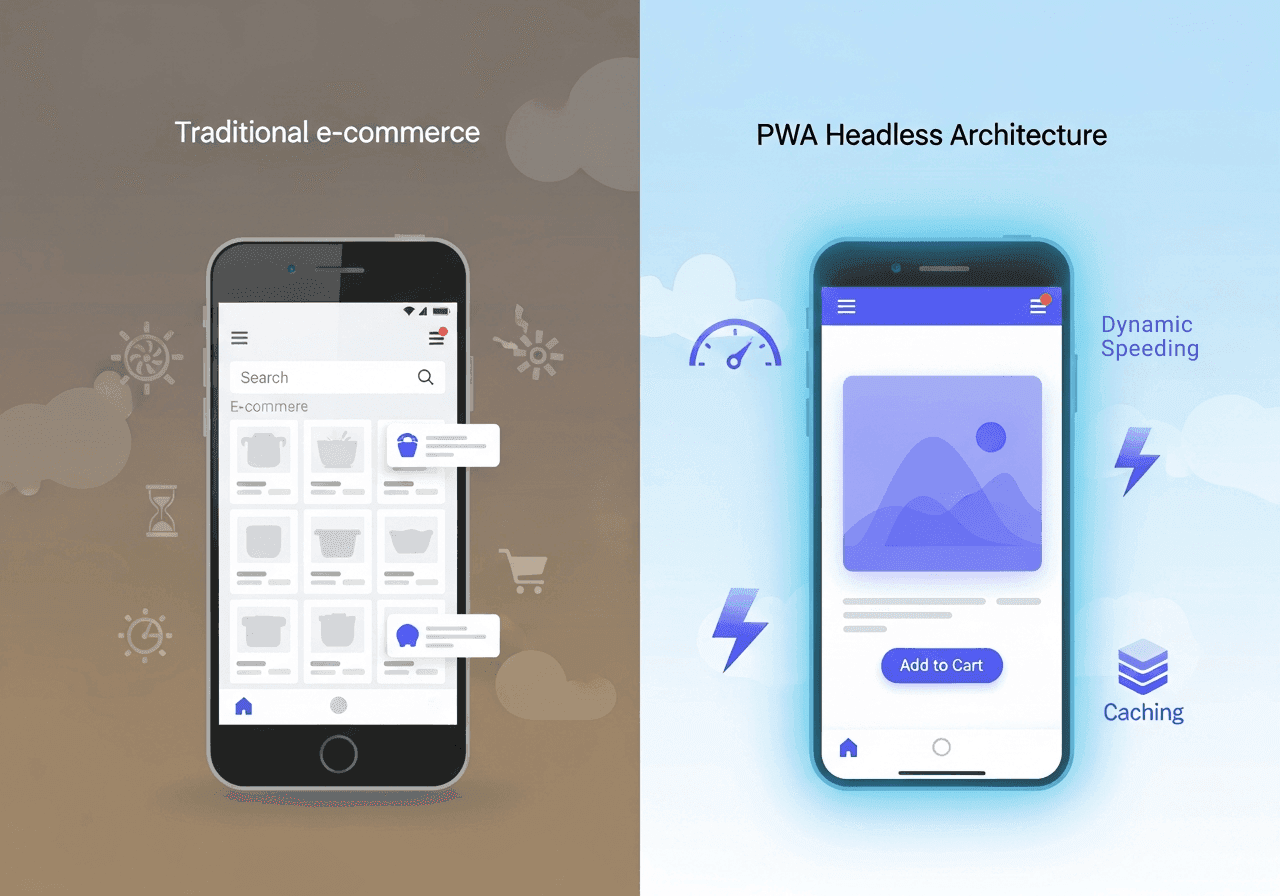
A PWA enhances mobile commerce by bridging the gap between responsive websites and native apps. Combined with headless Shopify, you gain performance and design flexibility unmatched by traditional themes.
1.1 Key Benefits of PWAs for Mobile-First Commerce
1. Lightning-fast performance PWAs load quickly thanks to caching, preloading, and optimized client-side rendering. This directly supports Shopify brands seeking Core Web Vitals improvements.
2. Offline shopping capability With service workers, customers can continue browsing products even with unstable or limited internet access.
3. Installable like a native app PWAs can be added to a user's home screen with one tap—no App Store approval or costly native app development needed.
4. Push notifications Re-engage users through personalized, timely notifications, similar to native mobile apps.
5. Lower cost and easier maintenance One codebase works across devices and browsers, reducing engineering overhead.
II. Shopify Headless + PWA: A Perfect Match
Traditional Shopify themes have limits in performance optimization and mobile UX customization. Moving headless separates the frontend (PWA) from Shopify’s backend while still using Shopify for:
- Storefront API
- Checkout API
- Customer accounts
- Product and collection data
- Cart management
- Discounts, pricing, and inventory
2.1 What Does the Architecture Look Like?
Frontend (PWA)
- Built with modern frameworks: Next.js, Remix, Nuxt, React, SvelteKit
- Communicates with Shopify via Storefront API
- Uses service workers for offline capability and caching
- Fully customized UI/UX
Backend
- Shopify storefront API
- Optional middleware (Node.js, Hydrogen, or custom server)
- Headless CMS for content (Sanity, Contentful)
2.2 Why PWAs Thrive in a Headless Setup
Headless architecture lets you:
- Pre-render critical pages for super-fast mobile load times
- Control caching strategies and service worker behavior
- Build dynamic components without Liquid limitations
- Invent completely custom mobile navigation and micro-interactions
- Achieve near-native app performance on mobile devices
III. How to Build a PWA with Shopify Headless: A Step-by-Step Guide
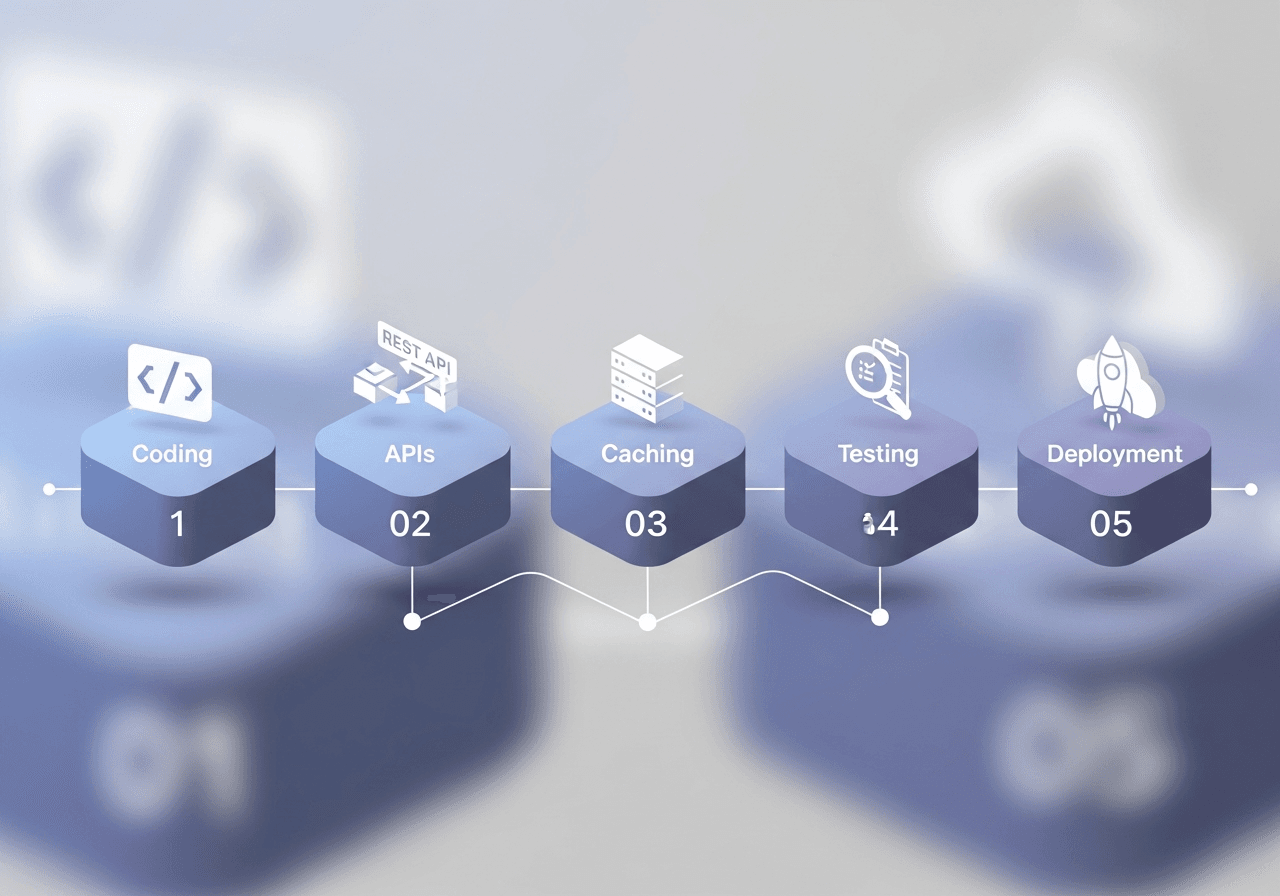
This section provides a practical breakdown for developers starting from scratch.
Step 1: Choose Your PWA-Friendly Framework
The most common choices include:
1. Next.js (Recommended)
- Strong PWA support
- Pre-rendering and dynamic routing
- API routes for middleware logic
- Integrates smoothly with Shopify Storefront API
2. Remix
- Optimized for fast web performance
- Natural PWA support through service workers
- Excellent for mobile-first UX
3. Hydrogen + Oxygen
Shopify’s native headless solution:
- Out-of-the-box integration with Shopify APIs
- Built-in performance patterns
- Can be converted to a PWA with customization
If your team prefers React, Next.js remains the most straightforward option.
Step 2: Set Up the Shopify Headless Backend
Follow these key steps in Shopify:
-
Enable Storefront API under “Apps and Sales Channels.”
-
Create a custom app to generate API credentials.
-
Retrieve:
- Storefront access token
- Store domain
-
Install required APIs for products, carts, and collections.
Ensure proper API permissions for:
- Read products, variants, collections
- Read prices and inventory
- Manage carts (recommended)
Step 3: Build the PWA Shell
Create the core structure of your PWA storefront:
Essential Components
- Home screen
- Category/collection pages
- Product detail pages
- Cart & mini-cart
- Search and filters
- Checkout redirection or custom checkout
Mobile-first UX Considerations
- Thumb-friendly bottom navigation
- Swipe interactions
- Sticky add-to-cart button
- Mobile-ready product images (WebP/AVIF)
- Lightning-fast search suggestion UX
Every element should be optimized for mobile engagement and speed.
Step 4: Implement Service Workers
Service workers enable caching, offline browsing, and background sync.
Key capabilities to implement:
1. Static asset caching
Pre-cache CSS, JS, and images to load instantly on repeat visits.
2. Dynamic product caching
Cache product pages after the first visit for faster browsing.
3. Offline fallback
Show a custom offline page that still allows browsing previously loaded products.
4. Push notifications (optional)
Engage users post-installation.
Tools to accelerate development:
- next-pwa
- Workbox
- Remix service worker APIs
Step 5: Improve Mobile Performance
A headless PWA offers full control over speed optimizations:
1. Lazy loading images
Load above-the-fold images only.
2. Use CDN-optimized images
Shopify automatically serves images via a global CDN.
3. Pre-fetch critical API calls
Load collections before the user navigates.
4. Reduce JavaScript bundle size
Split bundles and load components only when needed.
5. Optimize Core Web Vitals
- Largest Contentful Paint (LCP)
- First Input Delay (FID)
- Cumulative Layout Shift (CLS)
PWAs often achieve 90+ on mobile Lighthouse tests when properly configured.
IV. Using Shopify APIs to Power Your PWA
Storefront API Key Endpoints
- Products
- Collections
- Cart
- Checkout
- Customers
GraphQL Example Query (Simplified)
query ProductList {
  products(first: 10) {
    edges {
      node {
        title
        handle
        featuredImage {
          url
        }
        variants(first: 1) {
          edges {
            node {
              price
            }
          }
        }
      }
    }
  }
}
This makes data retrieval efficient and fast—perfect for PWAs.
V. UX Best Practices for Headless PWAs
Design Guidelines
- Prioritize one-hand mobile navigation
- Use high-contrast CTAs
- Keep the layout clean and distraction-free
- Include skeleton loaders for seamless transitions
- Provide multiple payment options (Apple Pay, GPay, Shop Pay)
Conversion Optimization Tips
- Add quick-view product cards
- Keep checkout steps minimal
- Display trust badges prominently
- Use persistent cart saved across devices
VI. Testing Your Headless PWA

Before launching, test thoroughly:
1. Lighthouse audits
Monitor:
- PWA checklist
- Mobile performance
- Accessibility
- SEO
2. Cross-device testing
Test on:
- Android
- iOS
- Safari, Chrome, Firefox
3. Offline mode testing
Ensure the service worker handles fallback gracefully.
4. Add-to-Home-Screen compatibility
Check iOS and Android guidelines for install prompts.
VII. Deployment Options
After development, deploy your PWA:
For Next.js
- Vercel (recommended)
- Netlify
- AWS Amplify
For Hydrogen
- Shopify Oxygen
For Others
- Cloudflare Pages
- Google Cloud Run
Ensure:
- HTTPS is enabled
- Correct service worker path
- Manifest.json properly configured
Conclusion
Building a PWA with Shopify Headless empowers merchants to deliver fast, app-like, mobile-first shopping experiences that convert users more effectively. By replacing traditional themes with a custom PWA frontend, brands unlock full control over performance, UX, caching strategies, and cross-device consistency.
Whether your goal is speed, user engagement, or mobile optimization, a headless Shopify PWA provides the flexibility and scalability required to meet modern ecommerce expectations.
If you're ready to build your own headless PWA custom, lightning-fast, and optimized for mobile-first shoppers; our team can support your development journey.
Read more: